Showing posts with label Design team cards. Show all posts

Thursday, 19 September 2013

Home flight

Morning bloggers!

Thursday is my favourite day of the week - it is my day off work!  So , today is a card-making day.  I have DT cards, prep for workshops and a 60th birthday card to make!!  Will it all get done?  Almost certainly not, but I have the weekend too!

This is another of the cards I made for the last TV show.  I really enjoyed using the ducks and saplings.  I saw a picture on the wall when I was waiting to go in to a meeting and it inspired me for this scene.

 
I used the remountable duck silhouette set along with the lovely large sapling stamp.  (There is also a small sapling available)
 
I do love the duck silhouettes, but I immediately thought of Hilda Ogden's wall in Corrie when I saw them!  I wasn't alone - Jane Telford made a wonderful 'Hilda' card (although she used the line art stamps on shrink plastic.)
 
Hope you all have a fab day and thank you for stopping by
Janet xx

Monday, 16 September 2013

A glittery scene

Hello everyone

Hope you are all okay!  This is a bit of a departure for me - lots of glitter!  I normally only use a minimal amount of glitter (or none at all!)

This is the lovely treescape stencil from Clarity.

I have to say that this isn't  the best picture in the world, so apologies for that!

I taped the stencil to some Kraft card and used a gold embossing paste on the top (sky) part of the stencil and silver embossing paste on the ground part.
Spread the paste evenly over the stencil, then remove the stencil carefully.
Sprinkle with glitter before it dries.  I used shades of blue for the sky and greens and browns for the ground.  Leave to dry, trim then mat and layer!

Thank you for visiting
Janet xxx

Saturday, 14 September 2013

More trees! (and shoulder blades...)

Hello bloggers!

Greetings from a rather damp Norfolk!  Isn't it amazing how quickly we can go from lovely, hot, sunny days to damp, cold and dull days?

Anyway, can't do any gardening, so may as well make cards!  (every cloud...)
I went for another appointment at my osteopath's on Thursday and this time asked him to sort my neck out as it had been a bit stiff.  I also explained about my strange shoulder.  I was born with one shoulder blade in a strange position, this hasn't really caused me too much trouble, but I don't have a full range of movement in that arm.  He asked me if I wanted him to 'have a go at sorting it out'.  I said 'Yes!'
He did a deep tissue massage, which was very painful, but the results were amazing, he lowered the shoulder (it had been too high!) by 30%!!  I can now look over my right shoulder without turning my whole body and the whole area just feels so much more comfortable - I hadn't realised how much discomfort it was causing me (because I had never known any different!) until it stopped.  Isn't that just amazing!??  I had never had any treatment because I never realised there was anything that could be done.

I am going back again in a month to see if he can improve it further!

So back to cards.... this is another of the sample cards I did for Barbara for the last TV show.  Again, I have used the next 'In the Classroom' set.  This time I used the naked tree and the mantle over the top.


I used the grassy border to make a frame, then stamped the scene inside.
For the trees, I stamped the branches first in Espresso, then added the green over the top.  You have to do a bit of experimenting with the right amount of ink for this, otherwise the branches can look too prominent!

Hope you like it!  I'm off to look over my shoulder ...because I can!!

Take care, Janet xx

Thursday, 12 September 2013

Monochrome Winter Tree

Hello Bloggers,

As it's turned a bit chilly, I thought it would be okay to post my 'Winter' card.  I did this using just one tree from the next 'In the Classroom ' set from Clarity - I used the 'naked' tree.  This set comes with four 'naked' trees and mantles which you can add over the top.  This is such a good idea, because you can so easily do the bark and branches a different colour from the leaves.

I have hundreds of tree stamps but I always love getting more! 

I masked off the central panel and stamped the tree randomly down the sides.
Then I masked off the edges and stamped the scene in the centre panel.  The strip of grass along the bottom of the tree is part of the set too.
The bird is one of the crows that came with the lovely Scarecrow set a while ago.

A bit of matting and layering and a few gems and you have your card!

Hope you like it and thanks very much for visiting xxx

Thursday, 5 September 2013

Duck and Drake

Hello everyone,

Remember me??  Sorry it has been so long since I blogged!  No excuses really.

My back is much better now, but still sore, so I am going back to the osteopath next week. 
Did you catch the Clarity shows at the weekend?  My favourite bit is always looking through the homework cards that everyone sends in - some brilliant cards there!!

This is my first card from the weekend, using the treescape stencil and the new duck and drake stamp sets.

I used Centura Pearl card for this.  I embossed the card with the stencil by running it through the Grand Calibur.

Place the stencil on the other side of the card and using a stencil brush, colour with blue and green inks.
Stamp the ducks on another piece of the same card, cut out and stick over the top.
Stamp the message on another piece of card.
Mat and layer, there you have it!!

Hope you like it!
Thanks for stopping by and hope to see you again soon
Janet xxx

Sunday, 21 July 2013

Deck the Halls....

Hi there bloggers! 

How have you all been?  For the first time in ages, I am actually getting a bit of a tan!  I have managed to get some time in the sun in the garden - lovely.
T.his is the last of my DT cards for this month - new stamps for next month have arrived, so I'm making a start on those now.  It is always exciting to get that package through the door to see what's coming up.

I really like the new Musical Score stamps, they make a nice change for Christmas cards.  I also love the holly sprig stamps, you get two stamps on one mount, but can remove them to use one at a time.  these stamps are so useful to make backgrounds or frames.  I decided to keep it fairly simple for this one.
I stamped and embossed the Carol with gold details powder, then stamped and embossed the holly sprigs with green powder.  I inked round the edges in green, added a bit of red glitter to the berries and dot and dashed a line round the edge.
The background is a paper from my stash which I sprayed with gold mist.

Take care and hope you come back soon xx

Monday, 15 July 2013

Back to Christmas!

Evening All! 
Sorry about this, but it is back to Christmas cards again!  I must admit, I wouldn't normally start my cards quite so early, but these were the stamps I got to work with for the Clarity DT.  Don't get me wrong, I love the stamps, just a bit early for Christmas for me!
This was my favourite of the cards I did - very simple design, this time a vertical strip with the ships, and a lovely idea to make the carol music scores.  If you like the music scores, keep an eye out, I think there are more on the way....

The ships are from the repositional ship set, you get three stamps on one mount and you can reposition them as you want.
I masked off the card to leave the strip exposed, then brayered with shades of blue - going from bottom to top and getting lighter as I worked my way up the column.
I then stamped the ships in place, using darker ink at the bottom and slightly lighter shades as they got smaller.
I created a bit of shadow under each ship using one of the texture stamps from the 'making a point' set from lesson 15
Remove the mask and add the I saw three ships music score
For the finishing touch, I used a fine line pen to highlight the edges of the strip.
Thanks for stopping by
Janet xx

Wednesday, 10 July 2013

Holly tree

I'm blogging this on Sunday, it is 17:02 and Murray has three championship points!!! He has just lost them, but hopefully by the end of this post, he will have won!
So what am I posting? A Christmas card!!  Doesn't quite seem right, but we have to get going if we're going to get them done by Christmas!!

Murray has another championship point.......which he's won!!!!  How brilliant is that!!!
Very well deserved and hard earned Andy!

So back to Christmas....
The  holly tree is stamped twice and embossed with a coppery embossing powder and coloured in with promarkers.  I cut the top part of the tree and layered it over the base image.  The berries are glittered.
The music score is also stamped and embossed with the same powder, then I've stamped the holly sprigs in various shades of green and coloured the berries red
Squiggle some lines round the edge and embellish with gems.
Thank you for visiting, enjoy the rest of your day
Janet xx


Tuesday, 9 July 2013

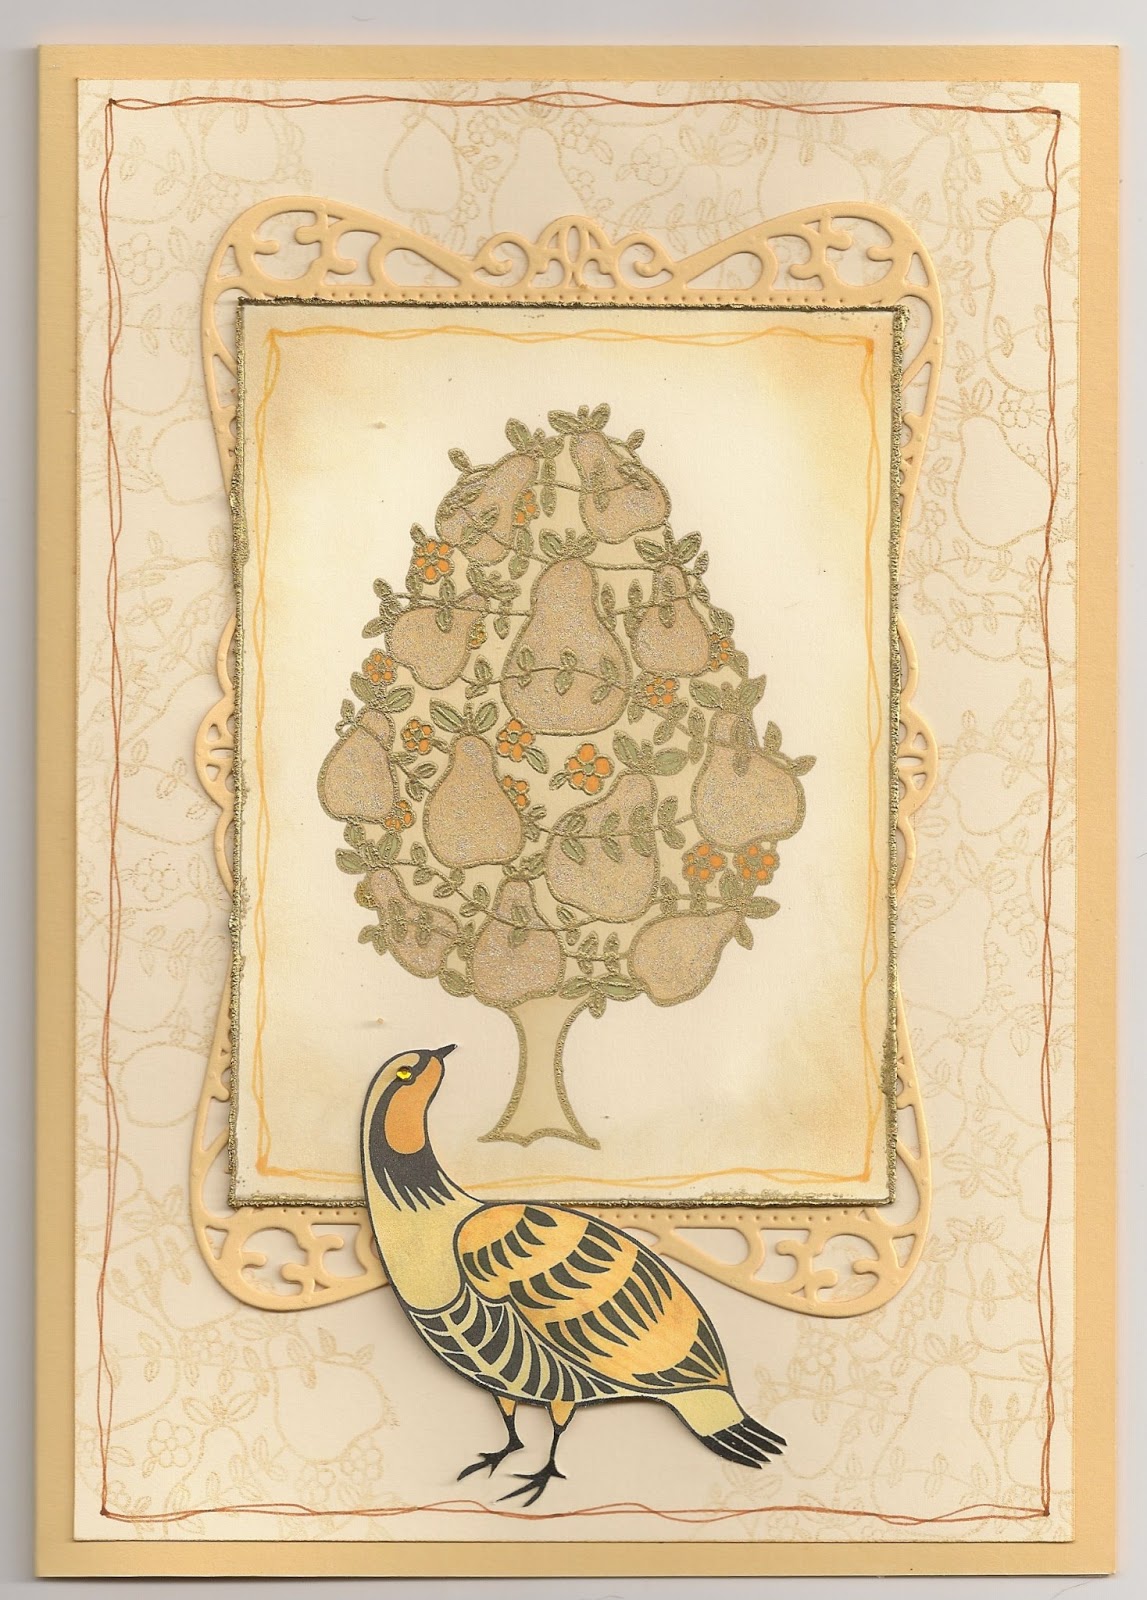
A Pear Tree and a Partridge!

I know, I know, it should be a Partridge in a Pear Tree, but I don't have the small Partridge stamp and this one was too big to be in the tree, I thought.

As soon as I saw the Pear Tree stamp, I thought cream and gold.


The main image is stamped and embossed with gold detail powder, then coloured with promarkers and glittered very slightly by using the gold stardust pen from Sakura

I also added a gold embossed border and squiggled a line around the edge of the image.
For the background, I stamped the pear tree in gold brilliance, which has a lovely sheen to it.

The Partridge is stamped and coloured with promarkers, then cut out and mounted on the card.

Hope you like it xx

Sunday, 7 July 2013

In the Garden

Hello fellow bloggers,
At last!  We have some hot and sunny days, let's hope it lasts for a while.  Time to get out in the garden, so I thought this card was very appropriate.

I really like the 'strip' idea in cards (you may have noticed!!) and I thought this garden set would go well with this style of card.  This is a really lovely stamp set from Clarity, one of the lesson sets.  It is the Birdhouse and picket fence set

This is a really easy card to do, I stamped the bird feeder in place first, then masked off the top and bottom of the card to create the strip.
Stamp all the images in place, then sponge blue for the sky and green for the grass.
I also masked off small areas and just stamped the very top of the hollyhocks stamp to give a bit of random flowery stuff in the background.

Remove the masks and draw along the edges with a fine line pen.
Stamp the birds and squirrel in place.
Hope you like it and thanks very much for visiting
Enjoy the lovely weather!
Janet xx

Sunday, 9 June 2013

Underwater scene - my first DT card!

I have been a part of the Clarity Design Team for a year now.  Barbara asked me last year at Cowden.  I can't believe it has been that long! 
 
This set of stamps was the very first set I got to work with.  I was sooo excited to get them, but it was only a couple of days before the show on the TV, so I stayed up til the small hours and made three cards ready to send them 'next day delivery' to make sure they arrived on time.
I tuned in on the Sunday very excited and hopeful that my cards would be shown - and they weren't!!  I was gutted!!  I know that many cards don't get shown and I am more used to it now, but I wish the producers there knew how much we put into the cards we make.  This is my favourite of the cards I made for that show and it is on the Clarity website and on the display boards at shows, so I feel okay about it now!
 
The bit at the bottom of the main image is done using Fran-tage embossing powders and glitters.
 
Wishing you all a lovely day
Janet x


Saturday, 8 June 2013

Breakfast?

Morning all!  I hope you have been enjoying the lovely sunshine!  We have to make the most of it while it's here don't we?
This is a lovely set of stamps for the next classroom with Barbara, you can never have enough grasses and silhouette stamps in my opinion.  I particularly like the animals in this set (especially the squirrel).
The main image is simply stamped out and the colour sponged in.
The backing paper is done by using the leafy branch from the set, stamping it in different colours.
I'm off to do some gardening!  I hope you are planning a lovely day.
Janet xx

Wednesday, 5 June 2013

Wrought Iron

Hello again everyone, hope you are all enjoying the lovely sunshine, sadly, I had to return to work today after a wonderful couple of weeks off.  They seem to cope without me! 
This is another of the cards for the shows at the weekend, this time using the Wrought Iron kit and Rosie from the Clarity characters.

I decided to go pastel and feminine with this one!  I only used two inkpads, latte and raspberry Adirondacks.  One of my favourite things to do is to create a frame around a scene. 
I do the frame first
Tear a square mask and put into place, then stamp around it all with the small tree from the kit.  I went round in latte and raspberry
remove the mask, then cover the frame.
I inked Rosie, my favourite of the clarity characters, with latte, then inked the larger tree in raspberry and 'kiss stamped' (stamped the tree onto the Rosie stamp) so when you stamp Rosie, there is a pattern on her dress.
Put a moon mask in place
Sponge some raspberry ink round the moon, then remove the mask
Stamp the rest of the images in latte.
Create a bit of shadow under the images, by sponging some more ink in place
Sponge more raspberry in the sky
Colour in the images with latte and raspberry as appropriate
Remove the mask around the frame and use a brown fine line pen to Squiggle round the inside of the frame
ink around the edge with latte
Mount on to brown then pink card

Add flower
Hope you like it!
Janet x


Monday, 3 June 2013

All that Jazz!

Back in Norfolk now, the sun is blazing!  I had a lovely time in Switzerland with my sister and her family, despite living in a cloud!  Norfolk seems very flat by comparison.

This is another card using the 'All that Jazz' set from Clarity. This time I used the Jazz Man stamp  This is also another one which sounds really easy, but it took me lots of goes and quite a lot of swearing to get this just right!

I stamped the first image, masked him, stamped the second image, masked him, then stamped the third image - sounds easy, what could possibly go wrong??  How long have you got??
Not necessarily in the order in which they happened:
I got the positioning wrong (several times, in different ways!)
The mask got so wet with ink that the arm of the man which was supposed to be behind started to show through the man in front, so it looked like he had got a hand through his chest!
I smudged one of the images
I got ink marks on the card
but eventually I got there!  and I am really pleased with the result.  I stamped the words in place using the letterbox set (didn't even think about trying to line them up, so went for  jaunty positioning)
I inked round the edges in old paper distress ink, archival sepia and black
I ran a brown fine line pen round the edge, using a ruler
matted on to card and the music score paper from Clarity (I inked round the edge of this too!)
Ta Dah!  If at first you don't succeed....just remember it is only a bit of card, chuck it out and have another go, and another go, and another go.....!
Hope you like it after all that
Happy Crafting
Janet xx

Sunday, 2 June 2013

Dance like no-one is watching

Hello from Switzerland, I have been sitting in a cloud up in the Alps, but I am due to come home tomorrow, so obviously the weather is due to improve. I haven't seen the Clarity shows yet, but thought I would share one of the samples with you...

I was delighted to get this stamp!  I love it, don't know why, but it just speaks to me.  It is part of the 'All that Jazz' set from Clarity.  This is the Jazz Montage stamp

This card is basically very simple. but takes some care to get a good result.
The main image is stamped with versa mark ink on to the shiny black Clarity card and dusted with a mixture of Perfect Pearls - Easy huh?
Well, the issue with this is that there is a lot of detail in this stamp and to keep that, you have to blot on to copy paper before you stamp on the black card, but you have to blot the right amount otherwise you don't get enough ink!  You also have to dust the card with talc first, so the powders don't stick where you don't want them.  It took me a couple of goes to get the colours the way I liked them.
The side panel is made by inking a spare piece of the black card with versa mark and dusting with the same colours of perfect pearls, then die cutting three diamonds
The music across the background is a die cut
Hope you like it
Janet x

Monday, 20 May 2013

Flourishes and Corners

This time tomorrow, I will hopefully be in Kent waiting to meet up with a lovely group of ladies.  We are going out for a meal and then off to the Clarity workshop on Wednesday and Thursday. I am really looking forward to it.  I have been to plenty of workshops, including other Clarity ones, but Cowden is really very special.  There is a wonderful atmosphere there - I wouldn't miss it!
This is another of my DT cards for HSE 24, this time using the remountable set  - Corners and Flourishes


I made two borders along the edges of a square piece of Theuva card by stamping the tiny corner stamp back to back
Ink round the edges of the card and lightly sponge colour over the whole area.
I used a Spellbinder DLite die to cut two squares and a small circle
Stamp the corner round the edge of the squares and blend some ink round the edges.
Stamp the greeting in the circle and ink round the edges.
Offset the two squares and stick together with the circle in the centre, mount in the centre of the other square
Stamp the tiny bow from the set, colour in, cut out and stick at the top of the squares
Mat onto the base card and add gems along the edge to embellish

The centre circle is not quite so stark white as shown in the picture here, it is actually more or less the same as the background!

There you have it - I'm off to pack...

Take care x

Sunday, 19 May 2013

Different Hummingbirds

Morning all, I have just been watching Maria Simms on the TV doing theuva Clarity shows.  It is lovely to see different ways with the stamps.  This card was shown during the show, so I thought I would share it with you

The Trumpet flowers come in Large and Small sizes and I used both to stamp along a strip of theuva card then coloured in with promarkers.  Ink around the edges
Stamp the large flower again onto a die cut oval of theuva card and colour in the same way. Ink around the edges
The  hummingbird is  created by using fusible film and fibre
Mat and layer everything onto matching card.  I added a touch of glitter pen on the stamen of the flowers and added a couple of gems.
Hope you like it xx

Thursday, 9 May 2013

Foxgloves

This is one of the cards I did for the Clarity TV show in May.  I love foxgloves, they are amongst my favourite flowers and I enjoy watching bees going in and out of the flowers.  Everyone seems to be going 'arty' these days, so I thought I had better have a bit of a go!  These are big, remountable stamps, I had an acrylic block big enough, but if you haven't, Barbara recommends using a ruler as you mount.  The stamps used are the remountable foxglove set from Clarity

  • For the background, I used watercolour paper and lightly spritzed it with water, then repeat stamped the foxglove stamps using multi-coloured dye based inks
  • Completely cover the paper, then spritz with more water, so the colours run and blend with each other, there should still be bits of the images left
  • Lightly blot with copy paper, then dry with a hear gun
  • Ink around the edges with one of the colours from the inkpad
  • Mat onto dark pink card and then onto the base card
Main Images
  • For the three images, stamp the foxgloves with a black archival and colour in with inktense pencils
  • Tear round the edges and mat onto a dark pink card and tear round that
  • Mat onto the card
There you have it!
Enjoy your day
Janet xx

Wednesday, 8 May 2013

Addicted to Gelli - Part two

While I was making the backgrounds with the Gelli plate, I also had a go at using the Splodge Away masks with it - they gave brilliant results.

The paints were from the same Introduction set, this time using red, yellow and blue, rolled out with the brayer.

The message is from the lovely word set from Clarity - very useful because they are remountable, so you can make your own message

  • Place the splodge mask over the top, use some copy paper to rub over the mask, so that it picks up the paint and remove
  • Place the mask paint side down onto card and rub over with the same bit of copy paper to transfer the paint
  • Do another piece of card, but this time use the mask and bubble wrap to make patterns on the gelli plate and pick the paint up from the plate
  • Once the paint is dry, stamp and emboss with white powder the Happy birthday message
  • Cut out the message and mat onto red and blue card
  • Cut out the base square and mat onto red and blue card, then the base card.
  • Embellish with a beautiful butterfly die cut from Spellbinders Dlites range
  • and some white gems
Hope you like it
Janet x

Tuesday, 7 May 2013

Addicted to Gelli - Part One

If I am being totally honest, I couldn't get too excited about this new fangled Gelli plate, but I don't like to be left behind, so I thought I would buy one.  I got the smaller size and it sat in the wrapper for quite a while before I opened it and had a go......WOW!  I had so much fun!!  I felt like a proper artist, this is the first card I did - for the Clarity DT, for the May show on C&C.

Douglas and the Umbrella.

It is recommended to use Acrylic paints with the Gelli plate, so I treated myself to the Introduction set from Clarity, fished out an old brayer and off I went.

  • For the background, I used blue, black, white and a tiny bit of brown, squeezed them all onto the plate and spread them all over with the brayer, to add a bit of interest, I wrapped an elastic band round the roller first.
  • Once the paint was spread evenly, I dabbed some bubble wrap over patches.
  • Place your card over the plate and smooth over to pick up all the paint.
  • I loved the effect!
  • I did another, smaller bit in the same way, but with a bit more brown - I used this piece to stamp on
  • Once all the paint was dry, I stamped Douglas and the umbrella from the Clarity characters set and the words from the Happy Words set in versa mark and embossed with lovely silver/black embossing powder from Crafty Notions
  • Then I simply tore everything to the size I wanted and matted onto dark grey card, then onto the white base card
  • Add some white card candy
  • Voila!!

  •