Saturday, 13 July 2013

Workshop cards

Hello again, this is one of the cards we did at the Diva Red workshop last Saturday.  This one is my version of the card Moira did.  For the original version, have a look on Moira's Blog, she has a version done on black card too, which looks great.
 
 
  The Alliums are from Clarity and are stamped and embossed with WOW purple glitz embossing powder, the circle is fusible film and fibre ironed first, then a black peel-off added, and cut out, then the black centre bits were added back in to create the flower heads.
The edge of the card is embossed with the same embossing powder to create the border and I've added a touch of glitter glue to the flowers


This is one of the cards I did, it is very much the same as one I posted earlier, so I won't go into how to make it again.  There was a butterfly on the original, but I decided to stamp a message on this one

 
Hope you like them, we all had fun making them xx

Friday, 12 July 2013

Birthday wishes

Hello all, how is your Friday going?  Mine is good, now that I am home from work!  (Actually, it wasn't that bad at work, but I can't get out in the sun!)
I have had some complaints about the amount of Christmas cards I've been blogging, so this is a birthday card I made for my brother....
 
~The background is some lovely paper I found in my crafty stash, Douglas is stamped and embossed then coloured with promarkers.  The words are from the clarity Happy words set.  They are stamped and embossed too.
 
Thanks for visiting, hope you come back soon xxx

Wednesday, 10 July 2013

Holly tree

I'm blogging this on Sunday, it is 17:02 and Murray has three championship points!!! He has just lost them, but hopefully by the end of this post, he will have won!
So what am I posting? A Christmas card!!  Doesn't quite seem right, but we have to get going if we're going to get them done by Christmas!!

Murray has another championship point.......which he's won!!!!  How brilliant is that!!!
Very well deserved and hard earned Andy!

So back to Christmas....
The  holly tree is stamped twice and embossed with a coppery embossing powder and coloured in with promarkers.  I cut the top part of the tree and layered it over the base image.  The berries are glittered.
The music score is also stamped and embossed with the same powder, then I've stamped the holly sprigs in various shades of green and coloured the berries red
Squiggle some lines round the edge and embellish with gems.
Thank you for visiting, enjoy the rest of your day
Janet xx


Tuesday, 9 July 2013

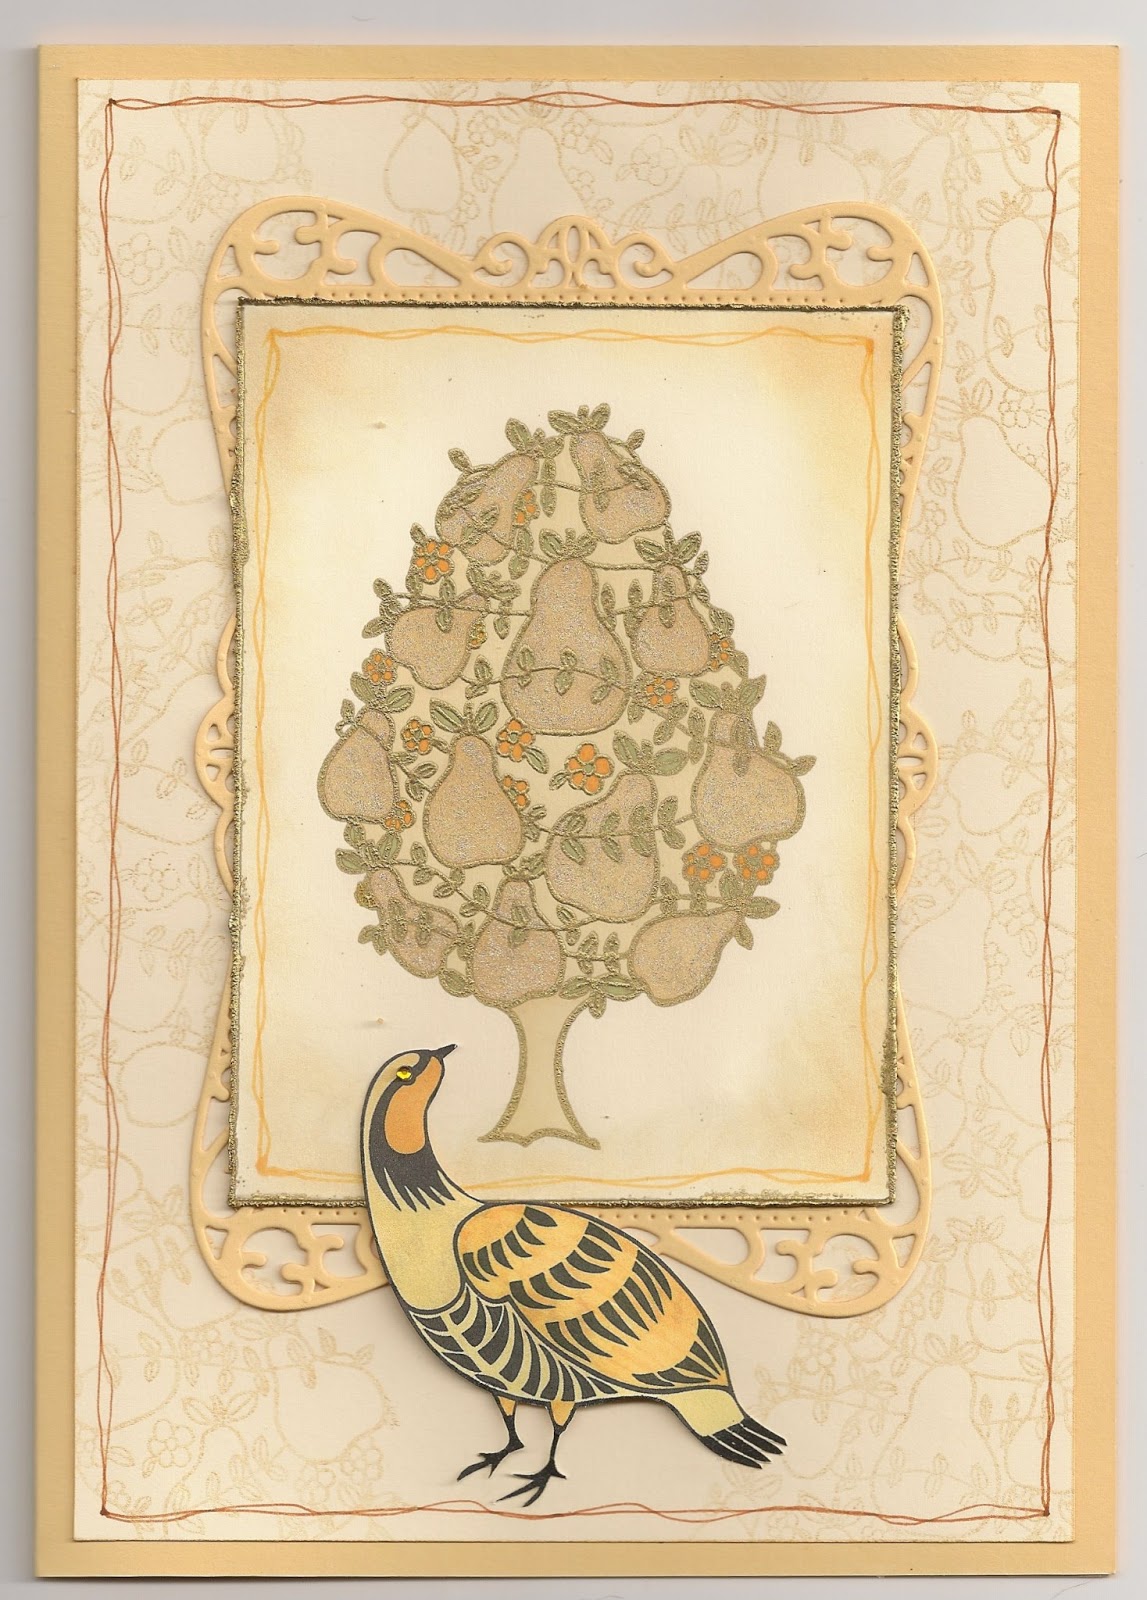
A Pear Tree and a Partridge!

I know, I know, it should be a Partridge in a Pear Tree, but I don't have the small Partridge stamp and this one was too big to be in the tree, I thought.

As soon as I saw the Pear Tree stamp, I thought cream and gold.


The main image is stamped and embossed with gold detail powder, then coloured with promarkers and glittered very slightly by using the gold stardust pen from Sakura

I also added a gold embossed border and squiggled a line around the edge of the image.
For the background, I stamped the pear tree in gold brilliance, which has a lovely sheen to it.

The Partridge is stamped and coloured with promarkers, then cut out and mounted on the card.

Hope you like it xx

Monday, 8 July 2013

More gardening!

In the card-making sense, that is!  I haven't actually been gardening, you understand!   What a dilemma on Sunday; Barbara on the TV, Andy Murray playing in the final and the first really hot and sunny Sunday for ages!  I sat in the garden for part of the morning, recorded Barb and watched Murray.

I wasn't at all sure about this card, I wanted to do a sort of watercolour effect and it didn't really turn out the way I'd planned, but Barbara and Leonie said some nice things about it, so I thought I would blog it

 
The main images of the bird feeder and the cat are stamped in a brown archival ink, the rest of it is stamped by inking up the image with Adirondack inks, then spritzing the inked stamp before planting the image.
 
I didn't spritz the squirrel, but I did blot a bit off the bottom of the image, to make it look as if he was nestled amongst the branches.
 
Hope you had a great weekend!
 
Thanks for stopping by
Janet xx


Sunday, 7 July 2013

In the Garden

Hello fellow bloggers,
At last!  We have some hot and sunny days, let's hope it lasts for a while.  Time to get out in the garden, so I thought this card was very appropriate.

I really like the 'strip' idea in cards (you may have noticed!!) and I thought this garden set would go well with this style of card.  This is a really lovely stamp set from Clarity, one of the lesson sets.  It is the Birdhouse and picket fence set

This is a really easy card to do, I stamped the bird feeder in place first, then masked off the top and bottom of the card to create the strip.
Stamp all the images in place, then sponge blue for the sky and green for the grass.
I also masked off small areas and just stamped the very top of the hollyhocks stamp to give a bit of random flowery stuff in the background.

Remove the masks and draw along the edges with a fine line pen.
Stamp the birds and squirrel in place.
Hope you like it and thanks very much for visiting
Enjoy the lovely weather!
Janet xx

Monday, 1 July 2013

Diva Red workshop

Hello, I haven't blogged for a while, but I have been making cards, just not got round to blogging!  I will be blogging them soon, so 'watch this space'!

This card is the one I did for the Diva Red workshop last Thursday, very similar to one I've done before

The background is done by stamping the image lots of times with a multi colour inkpad, then spritzing with water, so the images all merge.  Use watercolour paper for this.

The lovely foxglove images are from Claritystamp